People like to use things secretly. I mean, while you were on Windows you always try to clear the Recent Items tab, and I am pretty sure that you would finding a way to do it on your Mac too.
Well, there are two places from where one can check the Recent Items. One is by clicking on the Apple icon on the top left corner of the Main Menu and the other is on the Finder. The one on the Finder window can be easily dragged and dropped in order to remove it from there.
So, its about removing it from the Apple icon options. And below is complete step by step guide to get it done.
How To Hide Recent Items On Mac – Step By Step Guide
As I already told you, if you trying to remove the shortcut of Recent Items from the Finder window, then you just have to do a drag and drop. But we are talking about the way to hide Recent Items on Mac from the Main Menu.
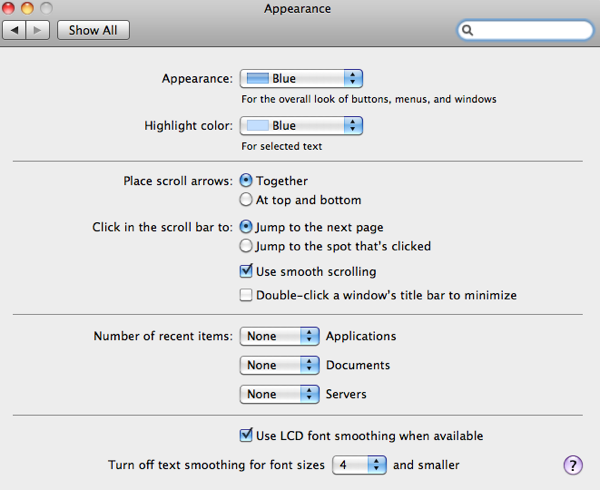
Open System Preferences and then click on Appearance. In some of the OS releases, you will find that the Appearance option is replaced by General option.
And once the Appearance / General option is launched, check the section labelled as Number of recent items and mark all the required file types as None so that it does not save anything into the Recent Items section.

That is it! This is how you can easily hide Recent Items on Mac.
