Windows 8 is proving to be on of the best operating systems of the current day. I am a huge Apple fan, but I have to say that the Windows 8 does have it all to compete with the brand new Mac OSX Mavericks.
Windows 8 is the only operating system (as of now), which has been implemented on touchscreen laptops, and its doing really good. Microsoft Windows has always been the popular OS because of its bigger user base, and when you get to learn some tips and tricks of any OS, you start loving it too.
 We have tried to list out some of the must know Windows 8 tips, tricks, tweaks and customizations. More the tricks you have in your hat, better would be your experience with the OS.
5 Top Windows 8 Tips, Tricks, Tweaks and Customizations
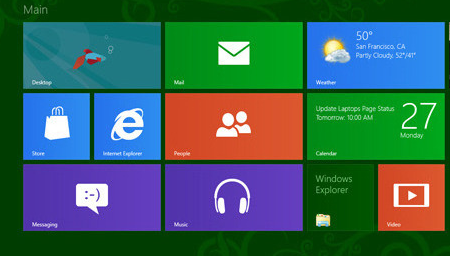
Customize Your Start Screen
They say the first impression is the best impression. So, how about customizing your Windows 8 Start Screen. If not for making impression, and just for making your self happy, you can follow the below steps to give a new look to your Start Screen.
- Open the Charm bar and click on Settings option
- Click on the Change PC Settings option and then on Personalize
- Now on the right side, click on Start Screen and get started with your job
- Put all your artistic skills into work and make the most to give a new look to your Start Screen
Disable The Right Click Option Of Uninstalling
Windows 8’s Modern UI is one of its best features. This Modern UI makes your life easier as it takes away your job of managing the desktop. If you wish to uninstall an app in Windows 8, then all you need to do is right click on the application and click on Uninstall option to get the job done. If you want this option to be taken off, as this has it own risks, you need to follow the below steps:
- Go on to the Start Screen and type in gpedit.msc
- On the list given, click on Apps
- This will launch Local Group Policy Editor which will be used to disable this feature
- Click on User Configuration on the left hand side panel, then on Administrative Templates, and then on Start Menu and Taskbar
- Now look for the option which is labelled as Prevent users from uninstalling applications from Start and change the option to Enabled and close the Local Group Policy Editor
- Now hit Windows + R and type in gpupdate /force and hit enter
That is it. Now you will not find that Uninstall option.
Enable God Mode
By God Mode, we mean having a means to access all the settings at one stop. This not only saves your time, but also let you get the feeling that you own that Windows 8 machine.
- First thing you need to do is enable the Hidden Files to be viewed
- For that, get on to any File Explorer and click on View option at the top Menu options, and put checks across the Hidden items and File name extensions option
- Now navigate to Desktop, create a New Folder and name it as GodMode.{ED7BA470-8E54-465E-825C-99712043E01C}
- This will create a new icon on Desktop. Now just double click open it and you will find number of customizations options and means to change settings
That is it. This is how you can create your one stop for changing major settings on your Windows 8 machine. And, you can use any other in place of GodName because, its the code after does which does the magic, not the name.
Organize Your Start Screen
Its Start screen is surely one of its top features, but at the same time, it becomes very important to organize it to make the most of it. If you finding home screen to be heavily cluttered, here is the way to organize it. All you need to do is think of different categories and start with one.
For an instance, if one of your categories is Utilities, then drag the shortcut of any such app, and drop it on the empty space on the left or right side. Once you see an evident separation between both the clutter and your dropped icon, you are good to go. Now do the same of all the apps, that you want to categorize together.
Once done, click on the Semantic Zoom option on the lower right corner of your screen to have a better view of the apps distribution on the home screen. Now right click on the group tiles and click on the Name Group option at the bottom. Give the group a name and you are done.
Picture Password
In these times of face detection and thumb print detection configured in place of password protection, picture password can also prove to be a safer option. All you need to do is choose a picture, where you need to join few points. And in order to unlock your PC, you have make those joins everytime. An interesting feature to try.
To give it a try, navigate as Win + I > More PC Settings > Users > Create a Picture Password.
This is the first installment of Windows 8 tips, tricks, tweaks and customizations. We would been soon back with its second installment.