Posters are nothing but huge printouts and giant versions of your favorite images or pictures. Here is a simple article describing how to make huge posters the ‘do-it-yourself’ way. You can create or make your own customized poster designs using your favorite pictures or images and can print your own posters free. This eliminates your need to buy posters as you can make any type of poster based on movies, art, sports, music, celebrities, emo or anything you like.
For this, we use a basic free application called Posteriza, you can convert your favorite photos into posters to stick on your walls or even make wallpaper for your room. Download the software from this link and just run it (no installation needed).
Some printers can do the same things Posteriza does, but what if you have a printer that cannot print one image in multiple tiles? All you need is a good borderless color printer for excellent results. The rest of the procedure is as follows..
-
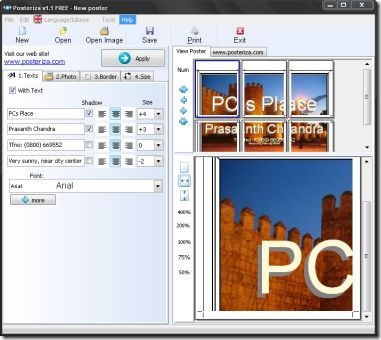
Download the program to your computer and run it. On the first page (Text), enter text if you want your poster to have personalized text or uncheck it if you don’t need text at all. Click ‘Apply’ and then click on ‘Photo’.

-
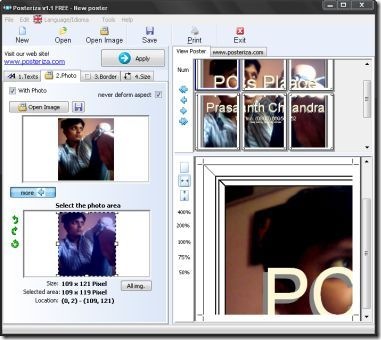
Click on ‘Open Image’ to choose the picture you want as a poster. Click on ‘More’ if you need to crop a particular part of the image for the poster. Click on ‘Apply’ and then on ‘Border’.

-
If you need a border for your poster, then click the ‘With border’ option and choose the border lines of your choice. Check the ‘Show header…’ and ‘Show cut lines’ options if you need each page printed with cut lines and page numbers. Click on ‘Apply’ and then on ‘Size’.
-
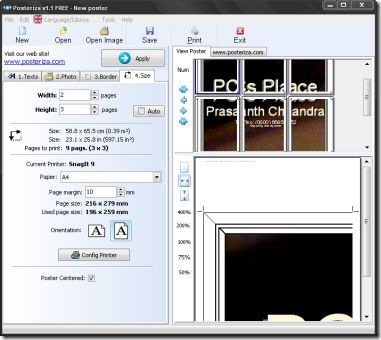
Choose the width and depth of the poster to be printed. This is the section where you choose how large your poster should be. Then choose the paper size, center the poster, configure the printer for printing and click ‘Apply’. Finally, print your poster or save the file for printing later or at another location if you do not have a borderless color printer.

-
After printing, assemble all the pages, cut them along the cut lines, and paste them together. Use sticky tape to secure the pages permanently if needed or simply paste the entire poster onto a large cardboard sheet. Your poster is now ready to be mounted on your wall or door.
Now that you know how to make a poster from your pictures, there are some points that you need to remember before printing your pictures. Make sure the photos that you use are in JPEG format, and are of high resolution and dpi. You might need help while pasting the prints together if you are printing large posters. Show your creativity and make your own customized posters easily.

this is why I love emo boys
I think you’ve a pleasant website here… at present was my first time coming here.. i just happened to find it doing a google search. anyway, good post.. i’ll be bookmarking this page for sure.
Hya, i have so many pictures of my own in jpeg i would like made into posters
but i am confused at each site that explains making your own posters.i use a HP deskjet
but even it was a different make how will a poster look? by that i mean after gluing and taping the pieces together,however careful you are you will still see its all joined up? or have i missed something?
Yea confused… still need that poster tho
Just found this site and im loving it already
How to create poster please send me the steps