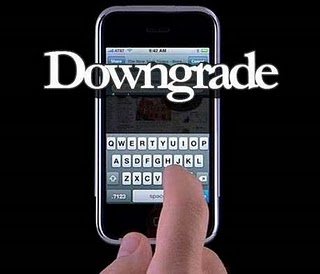
Here is the complete step by step guide to downgrade iOS 4.3.1 to 4.3, 4.2.1, 4.1 on iPad, iPhone, iPod Touch. Yes, you might feel the need to downgrade the firmware of your iOS device. And this would happen when some of your apps installed on iPad, iPhone face compatibility issues. For such cases, downgrading the firmware is the only way out.

Downgrade iOS 4.3.1 To 4.3, 4.2.1, 4.1 On iPad, iPhone, iPod Touch
STEP 1: In order to downgrade the firmware of your iOS device, download the old iOS files.
STEP 2: If you are a Windows user, navigate to the path C:\Windows\System32\drivers\etc\ and open the file named as hosts file and open it in any of the text editor.
And if you are a Mac user, navigate to the path /etc/ and there you would find the file named as hosts file and open it in any of the text editor.
STEP 3: Now in the hosts file, you need to add a the below code at the end,
74.208.105.171 gs.apple.com
Are wondering what changes would this edit would bring? This will simply redirect all your requests for authorization to Saurik server.
Once you make the mentioned changes, make sure that you save the file.
STEP 4: Now, you need to bring your iOS device in DFU mode. DFU mode would actually force your iOS device to restore the iOS in whichever version its given. But the thing is how do you actually bring your iOS device into DFU mode. Here are the steps:
First thing that you need to do is launch iTunes and then connect your iOS device to your computer. Now, hold the Home button and Power button for about 10-15 seconds and then release the Power button. Make sure that you keep holding the Home button until your computer recognizes your iOS device.
You need to take care of one more thing, which is to release the Home button as soon as your computer recognizes the device or else it will enter into the Recovery Mode. If your iPad, iPhone or iPod Touch displays nothing on the screen, it ensures that your iOS device is in DFU mode.
STEP 5: Now using the files that you have downloaded in Step 1, you need to restore that firmware on your iOS device. Below are the steps:
- Click on the iOS device on your iTunes and now if you are a Windows user, hold the Left Shift button and if you are on Mac, hold the Alt button.
- Now click on the Restore option (while doing so, make sure that you keep on holding the above mentioned button). And after clicking on the Restore option, release the button.
- Now iTunes will ask you to select the firmware file. So, browse to the location where you have downloaded those files, select the ipsw file and click on Open button.
STEP 6: Now your iOS device’s screen would be displaying some kind of progress bar. This shows the progress of the downgrade process of your iOS firmware.
While this process, if you encounter any of the errors like, “The iPhone could not be restored. An unknown error occurred (1004).” and “iTunes has detected an iPhone in recovery mode. You must restore this iPhone before it can be used with iTunes.” just ignore them and click on OK button as they wont hamper the downgrade process.
STEP 7: After all this process, you would find your iOS device stuck in Recovery Mode (it displays, Connect To iTunes message, which ensures that). To bring your iOS device to normal mode, you need to use TinyUmbrella.
That is it!

Send a mail