Its no longer a myth that a Mac machine cannot be affected by virus, spam, malware or any kind of unwanted things. And as the elders have said, its better to be secured than to fix, and no wonder its completely true.
But yes, Mac is relatively better than Windows in terms of security (and its my opinion). And just having a Mac won’t server the purpose as you need to know how to get the best out of it.
In this article, I have laid out the step by step guide to enable Firewall on Mac and then configure that Firewall. Having a solid Firewall is very necessary as this is the component which decides what enters your machine and what not. And having some control on that Firewall is so necessary. Lets get started with it.
Steps To Enable Firewall On Mac | Configure Firewall On Mac
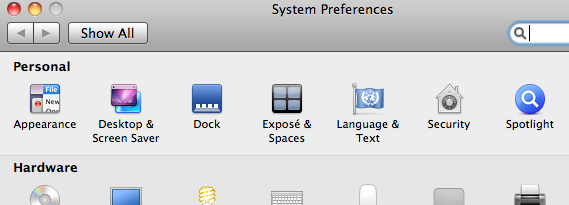
- Get on to System Preferences and click on the Security option under the Personal section
- On the opened window, click on the Firewall tab
- There you can see whether the Firewall is ON or OFF. And in order to turn ON Firewall, click on the Lock at the bottom left corner of the Window, type in the password, and click on the Start button to turn ON Firewall on Mac
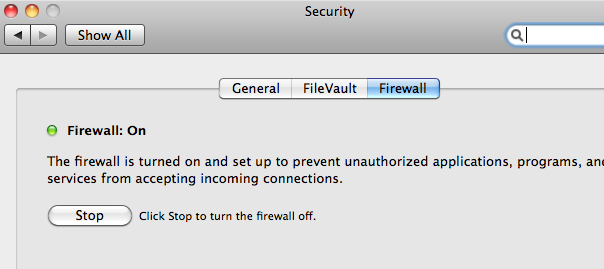
- This is how you need to turn ON or say, enable Firewall on Mac
- Now assuming that you successful in turning the Firewall ON, its time to configure it now
- In order to do that, click on the Advanced button on the bottom right of the screen and there, you can add all the programs which you wish not to block
- Other than that, there are two options, enabling Stealth Mode and Automatically allow signed software to receive incoming connections. Based on your requirement, you can select them or opt not to
That is it! This is how you can easily enable Firewall on Mac and configure it.