If you have a large document, creating an index could be really helpful in locating information within the document. An index lists all the important points and topics in your document under one orderly alphabetical list. Hence, Word provides you with an easy to use index maker. using this, you can create Index pages for your documents easily. Here is how its done..
- Select appropriate text that would be marked as an index entry.
- Choose “Index and Tables” by pressing [Alt] + [Shift] + [X].
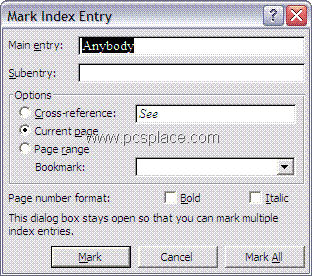
- In the “Mark Index Entry” dialog box you can add additional information like a subentry or a cross-reference.
- Click “Mark” to add the entry to the index.

NOTE: The dialog box remains open which allows you to scroll through the document and add one entry at a time.
- Place the cursor on the last page of the document (or the page where you want to place your index), then open the “Index” dialog box.
- You can choose a “Format” from the list that suits your document.
- Click “OK” to create the index.
NOTE: If any changes are made after the index is created, you will have to follow Steps 5 and 6 to refresh the changes that you recently made.

I most likely would not have contemplated this was helpful two or 3 months back, yet it is fascinating how age evolves the manner you respond to stuff, many thanks for the weblog post it really is pleasing to discover anything wise now instead of the typical rubbish masquerading as blogs and forums at the internet. Cheers